Blog
Blog

How To Weatherproof Your Outdoor Lighting for Year-Round Durability
Rain, snow, and changing seasons can take a toll on outdoor lighting — but with the right preparation, your investment can keep shining no matter what the forecast holds. A well-designed system not only brightens your space but also stands up to even the harshest weather. By choosing the right DEKOR® products and following a few proven practices, you’ll enjoy lighting that delivers lasting beauty, performance, and peace of mind. Choose Fixtures Built for the Elements Not all lights are created equal. When it comes to durability, start with fixtures designed for outdoor use that carry the appropriate IP (Ingress Protection) rating. This rating tells you how resistant a light is to dust and moisture, both of which can shorten its lifespan if not addressed. DEKOR outdoor fixtures are engineered for year-round use. Each is built with a powder-coated finish that resists corrosion and fading, plus sealed housings that protect sensitive components from moisture and temperature swings. Selecting the right fixture up front means you won’t have to replace lights every season. Use Waterproof Connectors for Reliable Performance Even the strongest light can fail if its connections aren’t protected. Electrical joints and splitters are often the most vulnerable parts of a system, small junctions that can expose circuitry to water, dirt, and corrosion. By installing waterproof connectors, splitters, and enclosures, you protect against shorts and extend the life of your entire setup. Safeguard Cables Underground Cables power your lights, which means they’re the backbone of your system. To keep them safe, bury wires 4–6 inches deep wherever possible. In areas with heavy foot traffic or exposure to lawn equipment, consider running cables through conduit for added protection. This simple step prevents accidental damage and shields wiring from weather extremes. Combined with DEKOR’s plug-and-play technology, it also makes your system easier to maintain and expand over time. Maintain and Clean Seasonally Outdoor fixtures naturally collect pollen, dirt, and debris. If ignored, this buildup can dim your lighting and strain components. Make it part of your seasonal routine to wipe down lenses, clear away leaves, and check seals for wear. In winter, gently brush snow from fixtures instead of scraping with metal tools that could scratch housings. During spring and fall, a quick rinse with a damp cloth keeps powder-coated finishes looking sharp. These small steps can add years of life to your system and keep your DEKOR lighting looking its best. Upgrade When the Time Is Right Technology and materials have advanced greatly in the last decade. If your system is older, it may not have been built for today’s outdoor challenges. Upgrading to DEKOR’s weatherproof lighting solutions gives you modern durability with premium finishes and LED efficiency. That means fewer repairs, lower energy use, and consistent performance season after season. Build a System That Shines in Every Season Weatherproofing your outdoor lighting doesn’t have to be complicated. By choosing durable fixtures, protecting your connections and cables, maintaining your system, and upgrading when needed, you’ll create a beautiful setup that performs flawlessly in any conditions. Explore DEKOR’s complete line of durable lighting to find fixtures designed to withstand the elements and keep your home glowing year-round.
Read more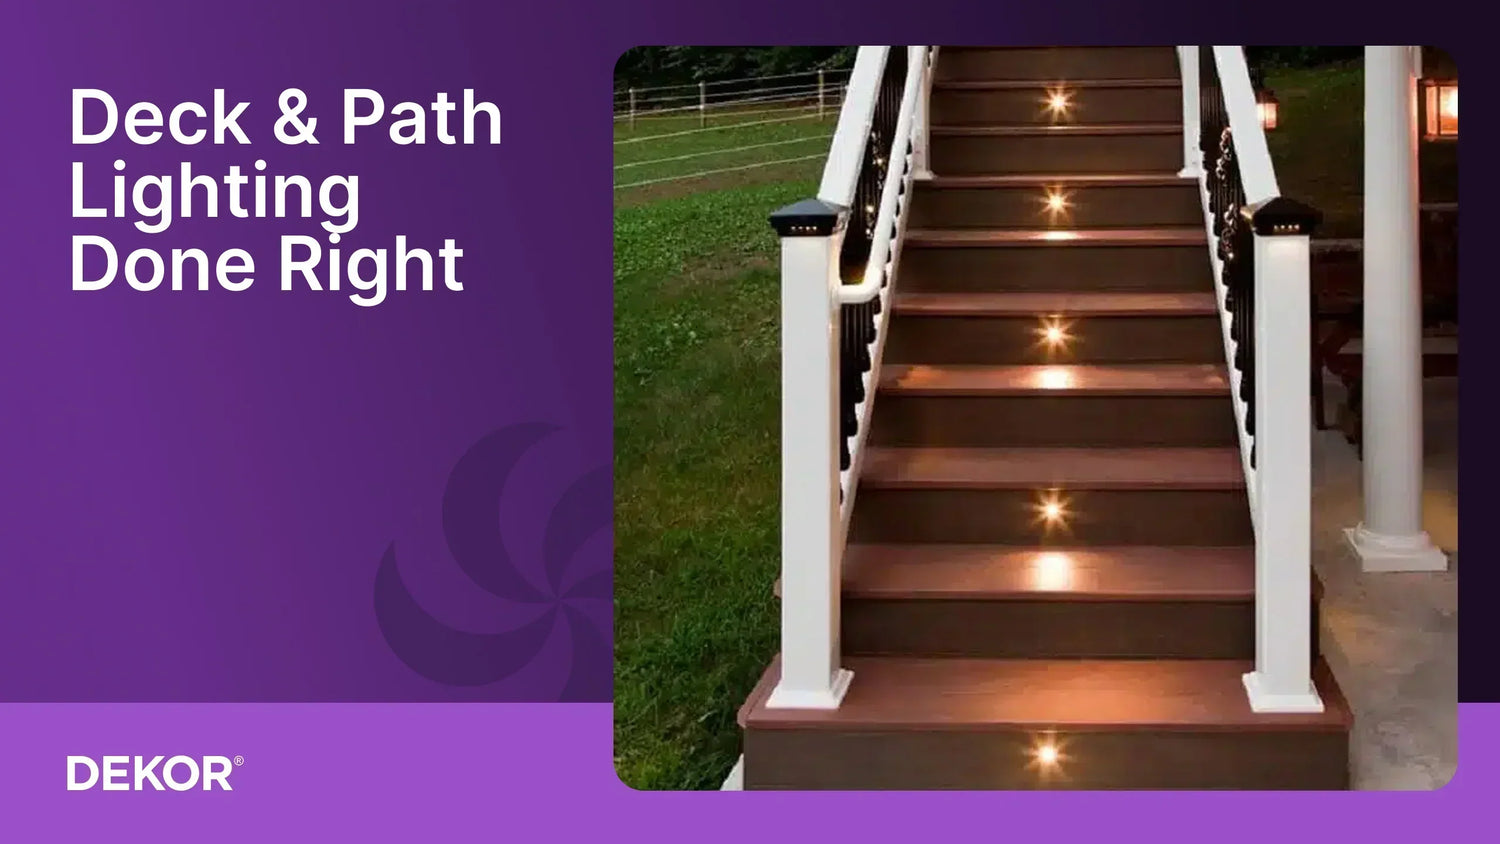
Deck & Path Lighting Done Right: Tips, How-Tos, and Ideas
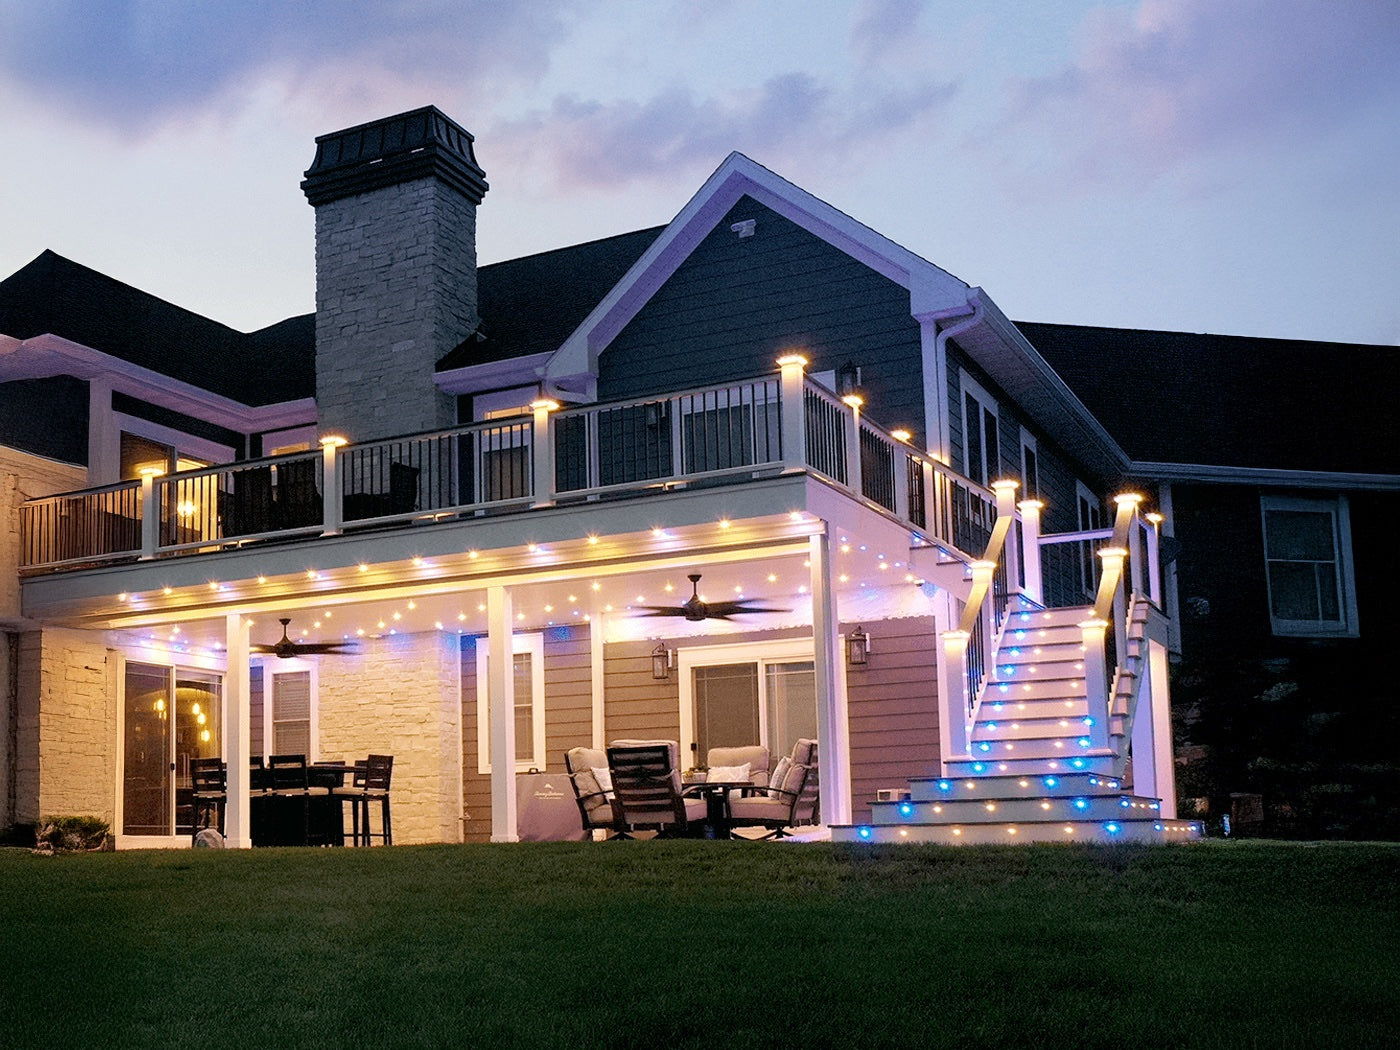
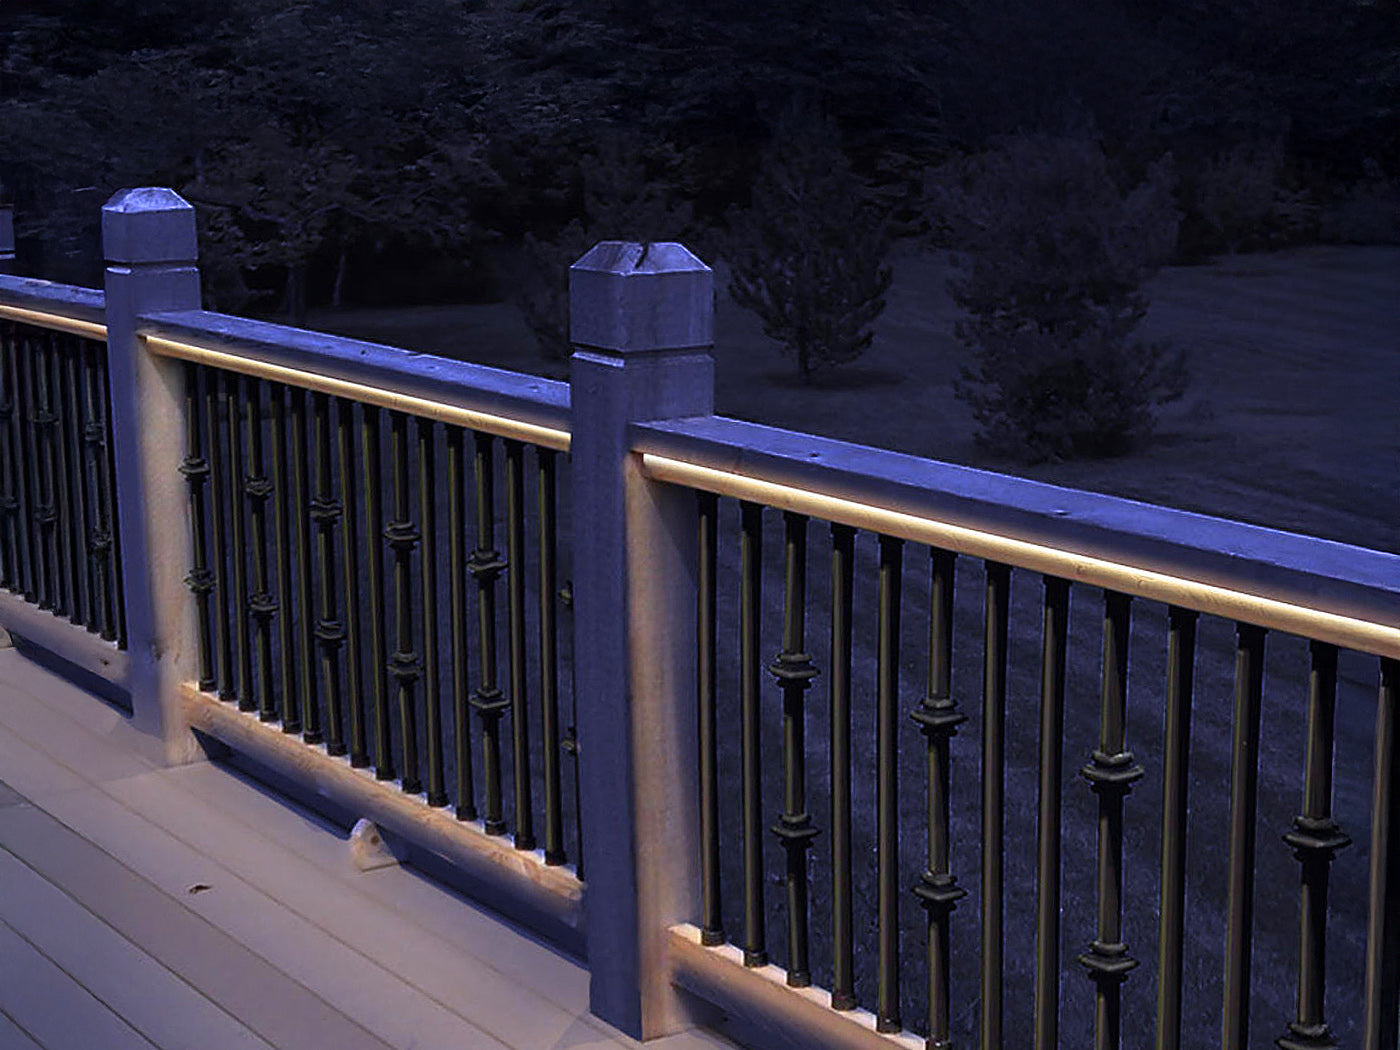
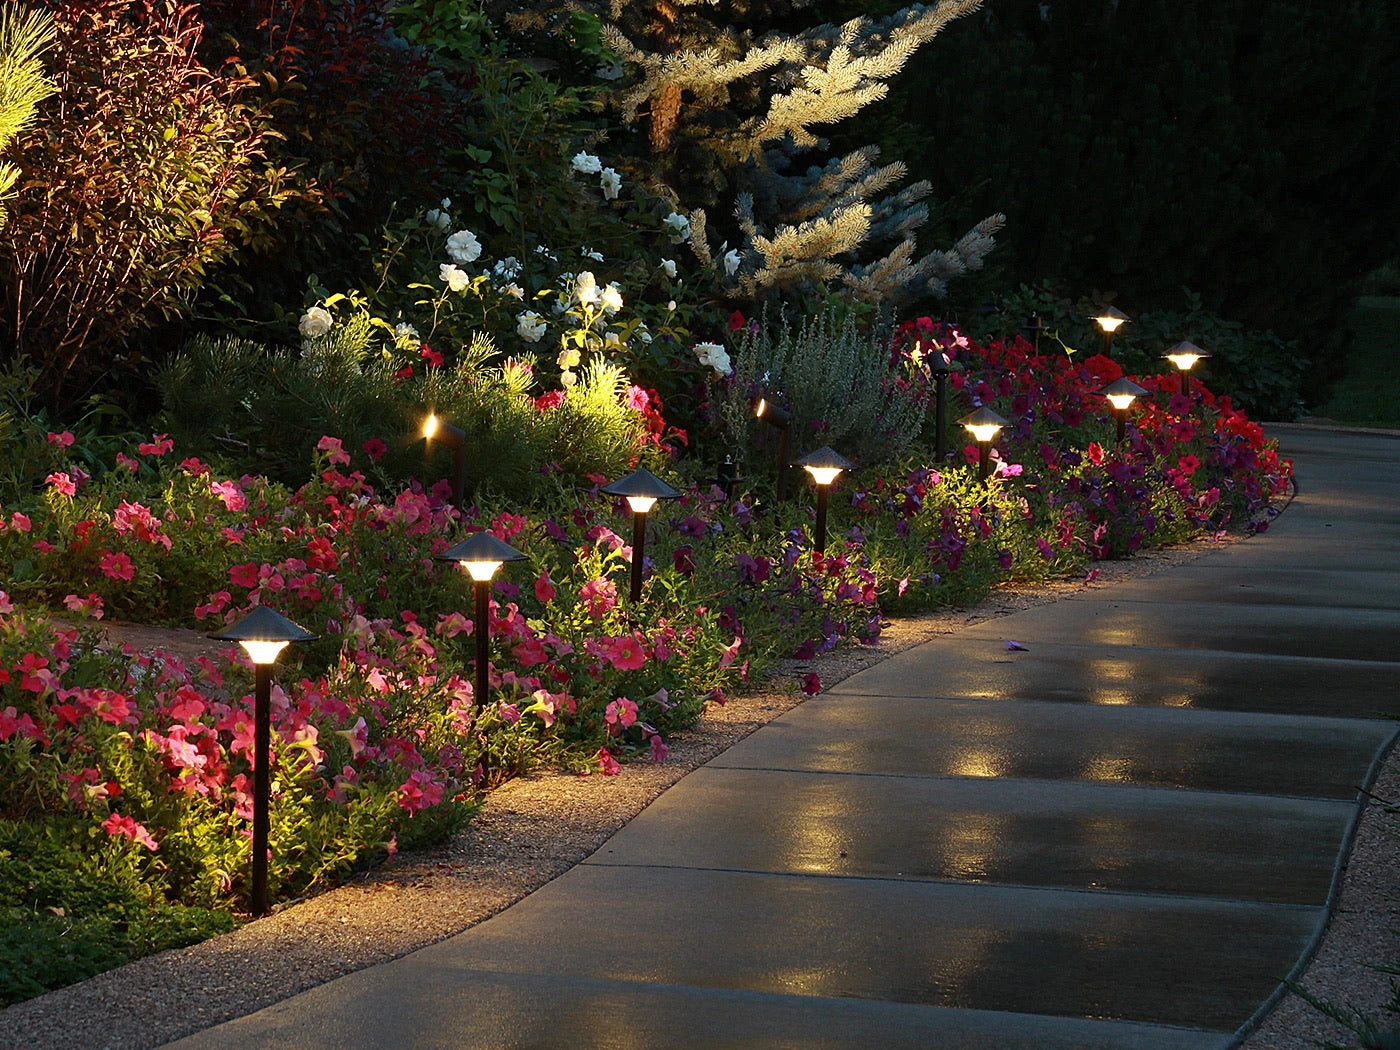
Lighting your deck or path is about more than visibility — it’s about creating an inviting, safe, and stylish outdoor experience. With the right fixtures and placement, you can transform your backyard into a glowing retreat that feels as welcoming at night as it does during the day. Whether you’re hosting friends, enjoying a quiet evening with your family, or making the walkway to your door easier to see, the right lighting choices make all the difference. Here are a few simple steps to follow. Step 1: Start With Safety The first rule of deck and path lighting may seem obvious, but it’s worth noting: safety first. Pathways and stairs are some of the most common places for slips, trips, and falls, especially after dark. A thoughtful lighting plan eliminates hazards while adding subtle style. Deck stairs and transitions: Recessed stair lights cast a soft downward glow that clearly defines each step without glare. This keeps your family and guests safe and creates a polished architectural detail. Winding walkways: Path lights show the way without overwhelming spotlights, making it easier to see changes in terrain while framing your landscape with a welcoming touch. DEKOR® stair lights and pathway fixtures are built for durability and weather resistance, so they’ll perform year-round without demanding constant upkeep. With lighting in the right places, you can move confidently through your space no matter the hour. Step 2: Add Ambiance Once safety is covered, it’s time to think about what kind of atmosphere you want to create. The best outdoor lighting sets the mood and reveals character, so your deck or path feels intentional instead of unplanned. An innovative lighting layout balances practical illumination with inviting warmth. Rail lighting: Hidden beneath the railings, professional-grade rail lights give your deck’s edges a soft, continuous glow. The effect is cozy and understated, perfect for slow, relaxing evenings. Post cap lights: Beyond their decorative role, post cap lights define boundaries and add a natural sense of balance to your lighting design. They’re functional, but they also elevate the design. When combined, these elements create depth and dimension, turning your deck into a natural gathering spot after the sun goes down. Step 3: Highlight Features Accent lighting gives you the chance to truly personalize your outdoor design. By drawing attention to the focal points you love most, you bring out the best in your landscape and architecture. Structural accents: Post caps highlight the vertical lines of your deck or fence, giving your space definition and polish. Natural features: Landscape spotlights aimed at trees, pergolas, or water features add drama and beauty, turning your backyard into a nighttime showcase. Personal highlights: Low-profile uplights can be tucked into flower beds, placed at the base of trees, or installed along gravel edges to give your favorite landscaping a dramatic flair. These finishing touches make your outdoor space feel more polished and personalized. Step 4: Plan for Power & Longevity Even the most beautiful design depends on solid infrastructure. A reliable power source and wiring plan ensure your deck and path lights look great — and stay that way. Choose the right transformer: DEKOR transformers are engineered to size your system correctly, so every light runs at peak performance. Go plug-and-play: With DEKOR’s EZ Plug-N-Play™ connectors, installation is simple and secure. Even first-time DIYers can achieve professional-looking results without complicated wiring. Think long-term: Manufactured in our Denver, Colorado, facilities, every DEKOR light is crafted for durability. Powder-coated finishes resist weathering, and LED technology keeps energy use low while delivering consistent brightness year after year. When you invest in quality, you’re not just lighting your deck and landscape for a single season — you’re creating an outdoor showpiece that you can enjoy for decades. Bringing It All Together Deck and path lighting should be more than an afterthought. Done right, they make your outdoor spaces safer, more beautiful, and more enjoyable. Explore DEKOR’s full line of deck and path lighting solutions to find fixtures that fit your style and project needs. With high-quality craftsmanship, smart installation options, and timeless design, you’ll have everything you need to create an outdoor retreat that extends a warm welcome each evening. → Shop Deck & Path Lighting
Read more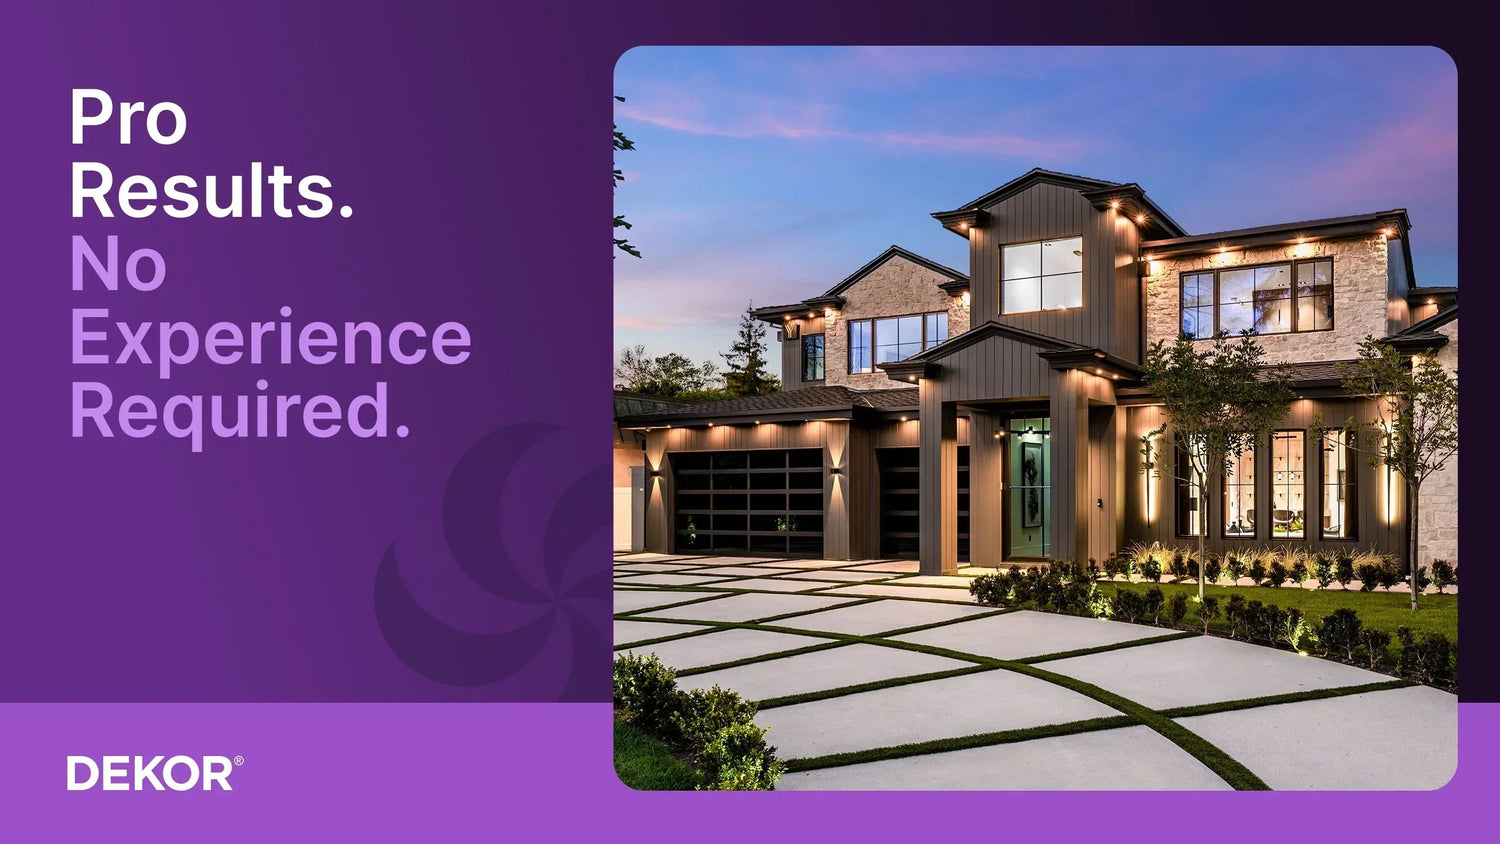
How to Install Landscape Lighting Like a Pro
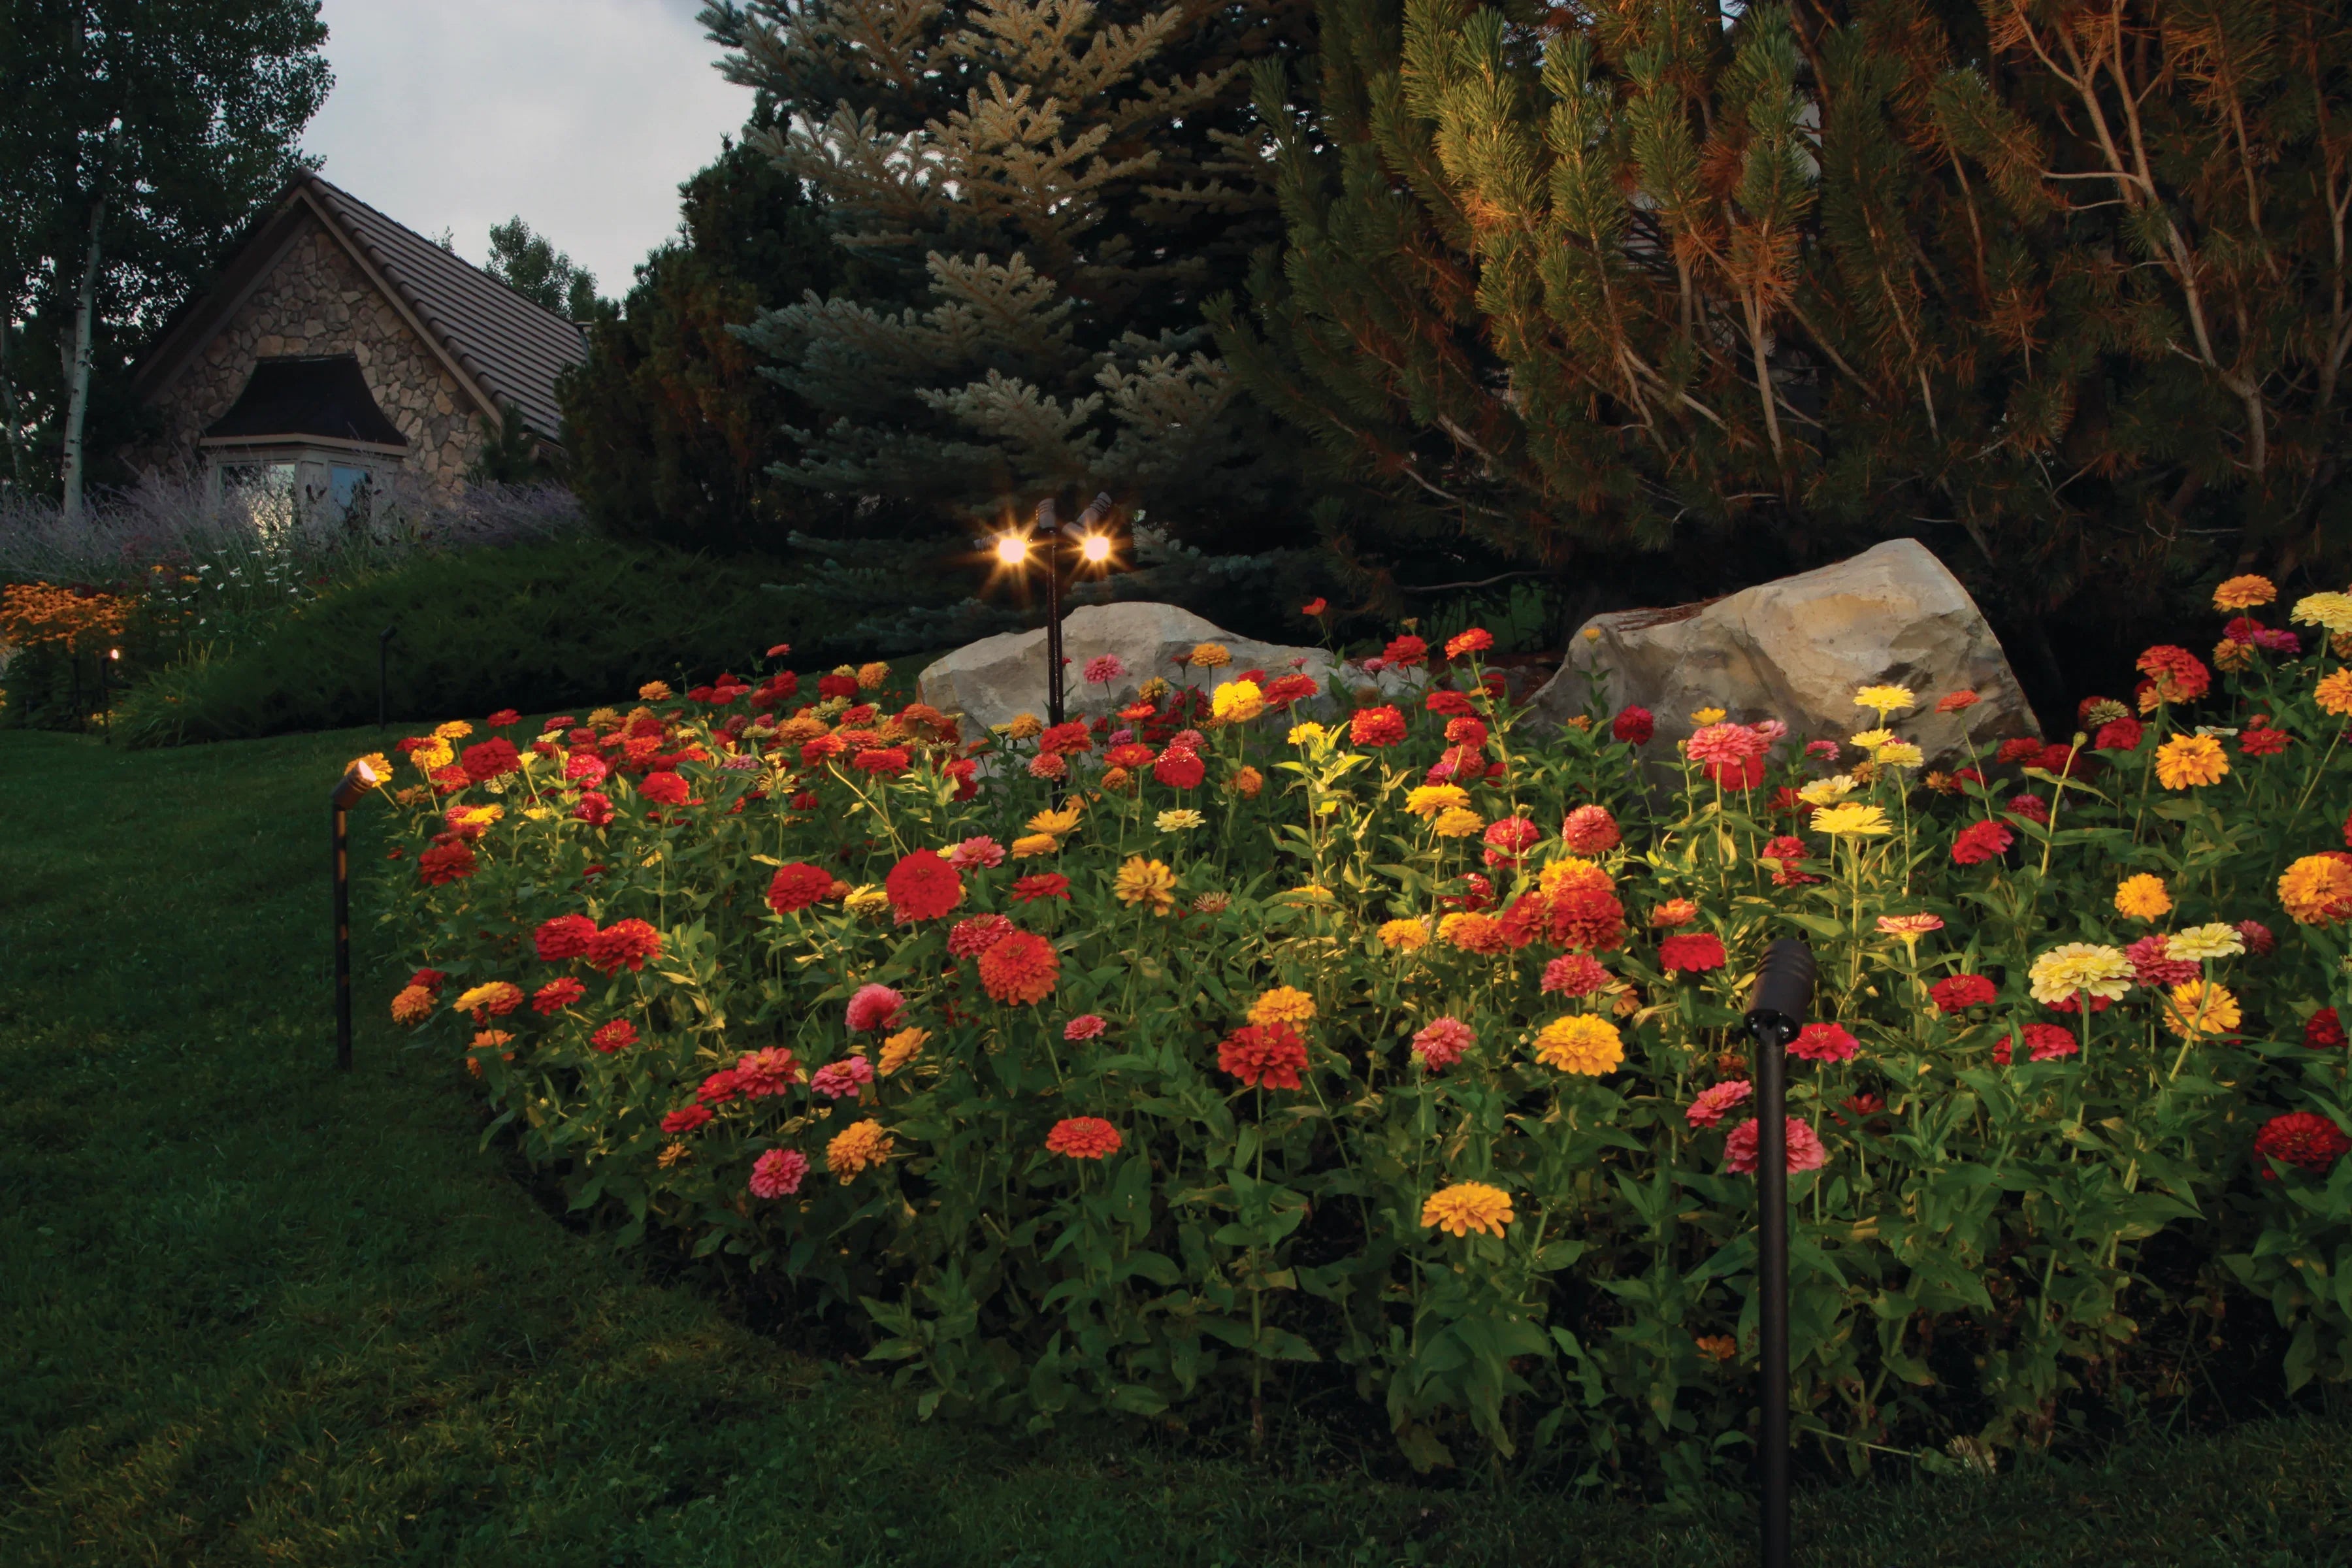
Installing landscape lighting isn’t just about illuminating your yard — it’s about enhancing safety, curb appeal, and functionality that lasts long after the sun sets. With the right tools, planning, and product selection, even DIYers can achieve a professional-looking result. At DEKOR®, we design our lighting with easy installation in mind, offering everything from plug-n-play systems to expert support. Here’s how to install landscape lighting like a pro — and avoid the common pitfalls. Step 1: Plan Your Lighting Layout Thoughtfully A great installation starts with a smart plan. Walk your property at dusk to see how the space really behaves after dark. Key areas to illuminate: Entryways, walkways, stairs, and standout plants or structures. Power source location: Know where your transformer will be housed and how far cables will need to run. Visibility & balance: Avoid lighting everything equally — focus on layering for visual interest. Sketch your layout and consider lighting “zones” based on function: safety, ambiance, and accent. Step 2: Gather the Right Gear With a solid plan in place, it’s time to get your tools and materials ready. A smooth install starts with the right DEKOR components. Low-voltage transformer: Choose one with room for growth. Use our transformer calculator to determine the wattage needed. Connecting cables: Choose based on run length and fixture load. DEKOR cables make installation easy with plug-n-play connections. Landscape fixtures: Durable, low-voltage options like our LED path lights, puck lights, or uplights. Waterproof connectors, splitters, and mounting stakes. Pro Tip: Our LED Landscape Light Kits come pre-configured for easy installation. Step 3: Install Your Lighting with Precision Now it’s time to bring your vision to life — carefully and methodically. Take your time with placement to avoid having to redo work later. Lay out fixtures above ground first to visualize placement. Use a flat-edged shovel to create shallow trenches for cable runs. Connect each fixture using waterproof connectors, leaving extra slack for adjustments. Test everything before burying wires. Keep fixtures aligned with their intended light pattern and avoid placing them directly in line-of-sight to prevent glare. Step 4: Final Touches for a Successful Installation Bury wires 4–6 inches deep and secure fixtures. Set your transformer on a timer or dusk-to-dawn sensor. Revisit the space at night to confirm lighting angles and balance. Avoid These Common Landscape Lighting Mistakes Even seemingly simple lighting installs can run into trouble. Steer clear of these missteps to keep your landscape illuminated and your system running as it should: Over-lighting every feature (less is more!) Incorrect transformer sizing Exposed wiring or non-waterproof connections No plan for future expansion When to Hire a Pro If your property includes slopes, heavy hardscaping, or multiple power zones, it may be worth partnering with a DEKORPRO for added expertise. If that’s the case, please contact us for more information. We’ll be happy to help. Final Thoughts Landscape lighting should blend into your environment while adding warmth and usability. Whether you’re lighting a winding path or spotlighting trees, thoughtful installation makes all the difference. Explore our full line of LED landscape lighting and get started with DEKOR’s easy-to-install solutions. → Shop Landscape Lighting
Read moreHow to Install Under Cabinet Lighting: A Guide from DEKOR®
Under cabinet lights are useful in a wide variety of applications. They light up kitchen counters and surfaces. They make it possible to see what you have on your cabinet shelves in the dark. And they’re a great way to add some indoor accent lighting to areas of your home you may not initially think to light up. There are also a wide variety of fixtures you can use to light the space inside of and below your cabinets. Strip lights are a classic solution. A light bar might also be to your taste if you’re looking for a sturdy light with an adjustable angle. Of course, you can also install disc spot lights, directional spot lights, and other light fixtures to create different under cabinet lighting effects. In this article, we’ll focus on two of DEKOR®’s most popular under cabinet lighting products: the NOSEEEM Strip Lights and our Under Cabinet LED Light Bars. We’ll walk through installation instructions for each product, step-by-step. You’ll quickly see how easy it is to install your own under cabinet lighting. How to Install Under Cabinet Strip Lights The versatile NOSEEEM Strip Light can be used in a number of applications. Here, we’ll talk about installing it under cabinets, but you can also install it inside cabinets, on top of cabinets, on steps, on the underside of stone caps, indoors, outdoors, you name it. Follow these steps to install strip lights under your cabinets. Determine the precise positioning of the first NOSEEEM Light Strip under your cabinet before you start. Mark the intended location of the screws. Use at least 3 screws per light strip. Pre-drill screw holes with 1/16″ drill bit. Attach the mounting bar with included adhesive strip ONLY unless conditions require you to use screws. Slide the light strip onto the mounting bar. Secure the light strip with small sections of the retaining cord. Repeat the steps with each additional section until you have installed the desired length of light strip. If desired, you can cut light strips to fit custom lengths, but this will terminate power at the end of the light strip. Connect the first NOSEEEM Light Strip to the transformer or power supply with a cable. Then connect every additional light strip with Plug N Play cables. If you’re more of a visual learner, watch this installation video for DEKOR NOSEEEM LEDs. How to Install Under Cabinet Light Bar Light Bars are another classic option for under cabinet lighting. While they can’t be customized quite as easy as strip lights to fit unique lengths and small spaces, they do come in a variety of different sizes. DEKOR® sells light bars in both 12″ and 20″ sizes, both available for individual purchase and in kits. Follow the next steps to install your light bar under a cabinet. Decide whether or not you’d like to install a dimmer and/or motion control for your light bar. The 12″ Light Bar Kit and the 20″ Light Bar Kit both come with a dimmer and a motion control device included. Determine the desired location of your transformer. You’ll want easy access to the transformer in case you need to service it for any reason. You may want to pre-drill holes for the cables or wires to run through the bottom of cabinets or between cabinets. Each light bar has a mounting bracket. Open the bracket to 90 degrees. Then attach the mounting bracket to the underside of the cabinet with included screws. Plug the light bar into the outlet or power supply, then tip the bracket to your desired angle. The mounting brackets are adjustable and can ratchet to shine exactly where you want them to. DEKOR®‘s Top-Quality Under Cabinet Lighting DEKOR® is the best option for your under cabinet lighting needs. Our LEDs are perfectly suited for indoor use: you will be amazed by the cabinet lighting projects you’ll be able to complete with our products. We offer not just strip and light bars, but also spot lights, disc lights, and more.
Read more
A Guide to Waterproofing Your Lighting Project | DEKOR
How to Waterproof Your Lighting Project Waterproofing your lighting project is key to maintaining its longevity and avoiding costly repairs down the line. There are several waterproofing solutions available to you, and the best method will depend on the type of light fixtures you have and how they’re situated. In this article, we will tell you exactly how to waterproof your lighting project. What Needs to Be Waterproofed? The first step in waterproofing your lighting project is determining which part(s) of the project need to be protected from water. You’ll want to focus on the following: Any exposed wire connections The light fitting (the portion of the light that sits against the outer wall of your home). Your transformer and controller Depending on your lighting setup, you may need to address more than one of the items in the above list. 4 Ways to Waterproof Your Lighting Project When it comes to waterproofing outdoor lighting projects, you have several options. And choosing the right one can be the difference between your lights lasting for years or failing prematurely. We’ll go through the four main types of waterproofing solutions for lighting projects in this section: 1. EZ Enclosure Kit for Transformers With low-voltage lighting, you’ll typically need a transformer. And if you don’t keep it dry, your lights won’t stand a chance. To waterproof your transformer and controllers, you’ll need an EZ enclosure kit, which is a convenient polycarbonate storage box. It’s completely water-tight and will accommodate your transformers and controllers. To mount your enclosure kit, you’ll need to follow these instructions from the manufacturer, DEKOR. 2. Waterproof Cord Covers Cord safety covers are another solution you can use to waterproof your outdoor light fixtures. They are plastic covers that fit over any exposed wire connections and snap closed to protect them from the rain. How to Use Waterproof Cord Covers Waterproof cord covers are very straightforward to use. All you do is place two connected wires inside the safety cover. It’ll keep water out so you can enjoy your light fixtures without worry. You may need many of them to protect all of your fixtures. 3. Silicone Caulk Silicone caulk is a great option for outdoor light fittings that are attached to your home’s exterior. This type of sealant is easy to apply and can provide a high level of protection against water damage. Silicone sealant is available in clear and white versions – choose the one that best matches your project’s aesthetic. How to Waterproof Your Lighting Project with Silicone Sealant To waterproof your lighting project with silicone sealant, here are the steps you should take: Begin by using a damp towel to clean the exterior surface of the light fitting. Grab your caulk and cut off the end of the container to open it. Be sure to do so at a 45° angle. Start to apply the caulk around the light fixture on each side as well as the top. Avoid caulking the underside of the fixture. You need to leave a small area untreated so that moisture from inside the home can escape. Smooth the caulk around the fixture with a caulk smoothing tool or your wet finger, and then allow it to dry. Note: Silicone sealant can be difficult to remove if you ever need to move your light fixtures, and it is not recommended for use on metal surfaces. 4. Waterproofing Tape Tape is a foolproof way to waterproof your lights. But not just any tape – you need specialized waterproofing tape. While it’s not as durable as silicone, it’s easy to apply and remove. How to Waterproof Your Lighting Project with Tape To waterproof your lighting project with tape, simply apply a few layers of tape around the perimeter of each light fitting. Make sure that the edges of the tape are firmly adhered to both the fixture and the wall behind it, or water can and will get in. You can also wrap the tape around any wire connections that may be exposed to water. How to Choose the Right Waterproofing Solution Choosing the right waterproofing solution is essential if you want your lights to remain dry. Here are some tips to help you choose: If your light is attached to the exterior wall of your house without any outside connections, choose caulk or tape. If your light is in an area that’s susceptible to super heavy rain on a regular basis, you’ll need an extra durable waterproofing solution. Opt for either caulk or waterproof cord covers. If you suspect that you’ll be replacing or moving your lights anytime soon, stay away from silicone caulk. It’s notoriously difficult to remove cleanly. If you have a transformer, use the EZ Enclosure Kit. Tips and Tricks for Waterproofing Your Lighting Project To get the most out of your lights, it’s so important to get the waterproofing step right. Here are a few tips and tricks to help you do it right the first time: Always clean the surface of your light fittings before applying any waterproofing tape or caulk. This will help the solution to adhere better and provide a longer-lasting seal. If you’re using tape to waterproof your light fixtures, press the edges of the tape down firmly. This will prevent water from seeping in around the edges of the tape. Always allow the sealant or tape to dry completely before exposing it to the elements. Whether you choose to use tape, caulk, cord safety covers, or an EZ Enclosure kit, you can rest assured that your lights will be protected. We hope that you found this article helpful, and we wish you the best as you take your home’s lighting and safety up a notch.
Read more
How to Install Pathway Lights: A Complete Guide
So, you’re on a journey to brighten up your landscaping. If you’ve already chosen which fixtures you’d like to add to your landscape lighting plan, it’s time to start thinking about installation. DIY installation may seem overwhelming at first glance, but we have put together a guide with simple steps to install some of DEKOR’s most popular path lights. Note that there are some basic materials you will need for any lighting installation job, including a low-voltage transformer, cables, connectors, and the lights themselves. DEKOR’s lighting kits come with all of the materials required to get the job done. You may also need tools to ensure your lights are securely installed and your wires are sufficiently buried, like a mallet, a drill, or a shovel. We break down exactly what is needed for each type of light below. Finally, before you get started, identify where the power sources and outlets are located in your yard and where you wish to place your lights. You’ll need to make sure that your wires are the correct length, so you can make the appropriate electrical connections to set up your lights. Installing EZ Yard Dot LED Path Lights Yard Dots add ground effect lighting in three easy steps: push it in, plug it in and turn it on. This may be a slight oversimplification, but these really are some of the easiest-install offerings from DEKOR. Yard Dots are available in several different styles and packages, including kits and colored dot lights, and these installation instructions will work for any of them. It may be a good idea to purchase these lights in a kit, especially if you have not installed outdoor lights before, because they come with cables and a transformer. DEKOR’s team has produced a video installation tutorial for Yard Dots: Follow these steps to install your EZ Yard Dot LED Path Lights: Assemble all of the items you need for installation (included in our light kits): your Yard Dots, HD cables, an EZ Max Transformer, and a rubber mallet. Decide where you want your lights to go, and place each Dot in your desired pattern. Tap the dots halfway down into the surface – whether it’s your lawn or ground cover – so they are covered up to the wire connections. The light fixture will tolerate gentle taps from a rubber mallet if needed. Attach cables to the remaining connections to get power to the next light. When connections are completed, cover with mulch, gravel, grass, etc. There is no required bury depth. Tap lights into desired depth. And there you go! It really is that easy to bring your outdoor lighting to the next level. Now your driveway or path will be beautifully and safely lit. You will be amazed at the huge difference these small lighting Dots make. How to Install Mushroom or Empress Path Lighting DEKOR offers several other path lighting options, including the Mushroom Pathway Light, the Empress Path Light, and the Lucentis Pathway Light, all available individually or as kits. While each of these light fixtures is unique, they all have the same installation instructions. You may even want to mix and match combinations of these landscape lights to make the lighting for each walkway its own. For this installation, you may need some tools if you plan to bury wire or place lights in a hardscape surface, including a drill with a 3/4-inch auger bit and a shovel. You will also need HD wire, Plug-N-Play connectors and/or splitters, and a transformer, all included if you purchase a light kit. Here are the steps to install these three low-voltage landscape lighting options: Locate the desired placement of lights and wiring. If you choose to bury the wire, under concrete or other permanent structures, plan accordingly. Place all lights in your preferred location. If necessary, use a 3/4″ (1.9 cm) auger within a drill to ensure the fixture is firmly in place. Run all wires from the power source locations to the lights on top of the soil, leaving them slack. If using separate circuits with independent dimmers, we recommend grouping the lights by light type. Connect all lights. Make sure connections, fixtures, and power sources (including splitters) are all working. Connect the opposite end of the male connector wire to a port on the multi-port splitter that is connected to the transformer or dimmer. You can mix and combine all lights on the same circuit but make sure you do not exceed the maximum number of lights per transformer. If running separate circuits with dimmers on each circuit, using a separate transformer for each circuit can simplify installation. However, the use of a 5-way splitter will allow for separate circuits on the same transformer. Preview light placement in the dark to make sure the effect you want is achieved. Test the lights to ensure power supply, connections, and light fixtures all work properly and placement is appropriate. Once the light, wire, and splitter placement is finalized, work from the light fixtures toward the power source to bury the wire to the desired depth. Ensure that lights are all working with all wiring attached prior to burying any wire. No more than 1 “-3” (2.5 cm – 7.6 cm) is required. These installation instructions apply to a wide variety of DEKOR lights. For example, our Telescoping LED Spotlight, the Well Uplight, and the Radiance Directional Landscape Light all use the same installation steps. So, if you plan on lighting up other parts of your yard, like a garden, you’ll become an installation master in no time.
Read more
9 tips to remember when using a contractor
Get Involved & Stay Involved – even if it is walking the job on a daily basis the more you are involved the more input you will have to ensure the job is going to meet the same expectations. Your level of involvement in the project will determine the outcome of the project. Researching Your Contractor – avoid using discount and free sites like Craigslist and Angie’s List. We have found in some cases that these contractors are unlicensed, uninsured, and underqualified. You really want to look at each company’s website and review previous jobs that they have done. Those that have invested to create a good quality website typically do good quality contracting work. You also want to understand who is going to be doing the work. We find that Owner-Operator companies are the most reputable and the highest quality since they will be doing the work themselves. TIP! – These people are not available two weeks out. You need to be booking with them a few months in advance. Get Everything in Writing – verbals Can Kill – sign off and initial on the plans as well as any changes to the plans. Again, ensuring that everyone has the same expectations. Also, ensure that there is a schedule. Weather Happens – so make sure that you build out your schedule in milestones, not just a beginning and end date. Before issuing a deposit check make sure you have a contract, a schedule and schematic of the project. Choosing Quality Materials Is Key – don’t take the low-end route. Low price almost always means low quality and while it sometimes looks good in the showroom that is something completely different than how it holds up to the elements. Pay more now and less on repairs later. For decking products consider composite materials over traditional wood materials. They are UV stable, don’t warp, swell, they retain their color, are slip-resistant. The only downside really is that they heat up. We recommend Trex as one of the top products on the market. Accessories and Originality – customizing your project with your own unique touches keeping your deck from looking like your neighbors. DEKOR offers a multitude of different lighting and deck railing options like post caps, balusters, etc, make sure to differentiate. Lighting, Lighting, Lighting! – the most important part of the project because you can provide a beautiful ambiance for the space you’re in. If you’re comfortable in a space you’ll be more likely to spend more time there. Controls – hopefully you took our advice on point number 6 and added lighting, now it’s important to understand how to control those lights. DEKOR offers a multitude of different options including handheld controls, smartphone and smart devices like Amazon Alexa, Google Assistant, Control4, and more through the DEKORKONNECT WiFi-enabled controller. We also offer products like the EZ motion sensors to automatically light your space to provide safety and security. Closely Check for Issues/Flaws – make sure that your contract includes a note that final payment is due upon your satisfaction. Develop a punch list of tasks that need to be completed prior to signing off. Do not get pressured into doing this in a short amount of time. Take a weekend to develop this list and use another set of eyes if available. Then go through this with your contractor. Warranties – warranties protect you against unexpected happenings. Reputable contractors will typically have a warranty on labor and workmanship for at least a year. Material warranties will be carried by the manufacturer and those are typically carried for 5-10 years. Make sure that the warranty is in writing. Lastly, get a ‘lien release’ from the contractor and subs. An example is 6 months after your job is done by a subcontractor that wasn’t paid by the original contractor and now they can put a lien on your house for non-payment of the work. Please contact our Customer Care team for questions about products, installation tips, and more.
Read more